According to Hosting Facts, there are almost 4.1 million Internet users throughout the world. Every day, over 3 million blog posts are published on the Internet, 500 million tweets are sent and 5 billion Google searches are made within seconds.
Having an Internet presence is paramount and the best way to have an online presence is by owning a website. You need two things to own a website, Getting a domain name and web hosting. This blog is for all the newbies out there who want to build a website but are confused with all the tech jargon that goes along with the process.
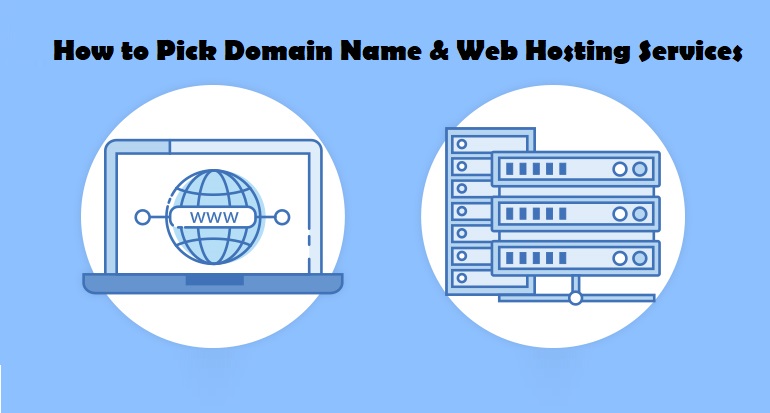
Stick around to understand how to pick domain name and web hosting services
HOW TO GET A DOMAIN NAME – BEGINNERS GUIDE
Domain name is your website’s address. For example, www.digital-web-services.com is the domain name of Google. What do you do when you need to visit the official page of Google? You type in the URL or the address in the search bar and hit Enter.
You need to choose a domain name that you want your target audience to use when they are looking for you online. If you want a free domain name with free web hosting services then the HostGator coupon is the best way to register your domain name with free web hosting services.
Simply put, if your website is your home, your domain name is the address. (Keep this example in mind since I am going to use it more often in the content for a better explanation.)
You can get your domain name in two ways:
- From an entirely new domain
- Buying a domain from someone who owns the domain already
The first process is cheaper while the second one is quite expensive. The decision is all yours. Choose a domain name that will make your brand rather and not break it.
THE STEPS TO GET A DOMAIN NAME ARE:
#1. Check the availability of your domain name
You have decided a cool domain name for your brand. It is time to check whether it’s available or not. You can check it on your domain registrar, or you can also use a WHOIS search engine for that purpose.
If the domain name is not available, try different extensions. For example, say you want a domain name for reliable_assignments.com. In case it is not available, try the same with .net or.org extension.
#2. Register the domain name with a domain registrar
Your domain name is available and it looks perfect for your brand. Now, you need to register the domain name.
The website of ICANN consists of several accredited domain registrars. Choose a registrar to get your domain name registered. The pricing for registration will vary from one registrar to another.
Additional Tip:
You need to provide your contact and ownership information to register your domain name. Once you do that, your email ID, home address, telephone number, etc. will be available to the public.
You have the option of making these details private. In that case, you have to use a privacy registration service that usually costs $10 to $15 a year.
That’s all there is to the process! It is quite easy to get a new domain name. Now, let us learn how to buy an existing domain name from its owner.
HOW TO GET AN EXISTING DOMAIN NAME FROM THE OWNER?
What if the domain of your choice is already bought by someone else? In that case, you need to transfer the ownership through services like that of Escrow.
Escrow is an independent third party agent that helps in the buying and selling of domains online. It provides a safe pathway to buy domains from sellers who want to let go of their domain names. Escrow.com, Sedo and BuyDomains are some of the most popular services that you can try.
The steps to buying the domain name using Escrow services are:
- Build an Escrow transaction between you and the seller
- You need to register an account at an Escrow service site first. Include the domain name and the sale price to determine the transaction details.
- Pay the amount
- After deciding the price, make the payment to the Escrow company through credit card, wire, etc.
- The seller transfers the domain name to you
- You will get the domain name right when your payment is approved by the Escrow company.
- Confirm the domain name ownership
After you have received the domain name from the seller, you need to confirm the transfer. You can use WHOIS to see if the owner profile has been updated.
Once you have your domain name ready, it is time to set your web hosting account. I would suggest you get the domain name first because you may not get your preferred name if someone paid for it already.
STEPS TO HOST WEBSITE IN A SHORT SPAN OF TIME
If domains were the address of your home, web hosting is the land on which your house is built. The domain is the identity of your brand while web hosting is where your business is located.
You can get the domain name and web hosting from the same company or from different companies. Go through the prices before choosing your web hosting service provider. Given below are the steps to host a website:
#1. Choose the type of website you want
You must determine the type of website you want to host. You have to choose best website designing company for create your dynamic website and a static website.
#2. Dynamic websites
Information in the dynamic websites is changeable on the basis of the time, your viewers, etc. You can use both client-side as well as server-side scripts to update content. These websites are CMR driven and it lets you add or edit content directly. You can also let your website visitors leave a comment on your web page. Blogs, photo galleries and e-commerce sites are some of the best examples of dynamic sites.
#3. Static websites
These are simpler websites with one or two web pages. You can’t make changes in these websites directly. You need to edit the pages in your desktop and upload them again. It has limited functionality and you do not have the option to execute e-commerce or experience interactivity. You can build these websites using software such as Dreamweaver and use FTP software to upload the pages to your web server.
#4. Select your hosting server
Static HTML sites can be built on multiple web servers. When it comes to the dynamic ones, you need to choose from the two main hosting servers.
- Linux hosting– You can run scripts such as Peri, PHP, Python and other Unix-oriented languages. This server supports MySQL and PostgreSQL databases.
- Windows hosting- You can run ASP scripts using .NET and other Microsoft technologies in this hosting server. It supports Microsoft SQL and Access Database.
Based on your hosting needs, you can choose either one of the hosting servers. If you do not require scripting support, Linux hosting will be more cost-effective. If your website requires database support and scripting, choose the platform that will meet your needs.
#5. Pick your web hosting plan
Web hosting servers have a wide range of service plans. As a newbie, you may find it difficult to make a choice. Here is a detailed description of each of the services to help you make a wise decision.
#6. Shared hosting
You can share the physical server with other website owners. You will have a separate account secured with login credentials.
#7. VPS hosting
Every website is stored on a pretty strong server with managed vps host, which is divided into several virtual compartments. Each unit functions independently since the server software is configured separately.
#8. Dedicated hosting
You will have an entire server for yourself. This is why it is faster, costlier, and more secure. It allows maximum customization, installation, configuration, and flexibility.
#9. Cloud hosting
This allows multiple virtual servers to work together to host a group of websites or a single website. The resources of this hosting can shrink or expand on the basis of the traffic that your website gets.
Beginners usually start with VPS hosting and the best part is that you can upgrade it with the growth of your business. If you want professional web hosting abilities at a fair price, VPS hosting is the one you should go for. If you have a low budget for your business website host then you can start your cloud hosting services from ResellerClub India and save up to 35% on your cloud hosting plan.
Pay for the plan that would suit your hosting needs and website requirements. The hosting is all yours once the payment is approved.
Now that you have your web hosting and domain name, it is time for you to link both to build the website. This brings us to the last step of the process.
#10. Change the DNS address
You will get the name servers or DNS from your web hosting service provider after you have purchased the web hosting. The DNS is the Internet’s equivalent to a phone book that consists of an IP address. You need to modify your domain name servers to start working on your website. Here is how you can do it.
- Visit the domain administration panel of your domain name provider. You will find the address in the email sent by your domain name provider.
- Click on the option that says ‘DNS’ or ‘Domain Name Servers’.
- Delete the existing name servers and update it with the name servers provided by your host company. You should have two name servers.
- Hit the Update button and save your choices.
It will take 20 to 48 minutes for these changes to take place and for your website to go live.
Here’s hoping that this guide was helpful enough to get you through the domain name and web hosting process. Good luck with your website.
Digital Web Services (DWS) is a leading IT company specializing in Software Development, Web Application Development, Website Designing, and Digital Marketing. Here are providing all kinds of services and solutions for the digital transformation of any business and website.